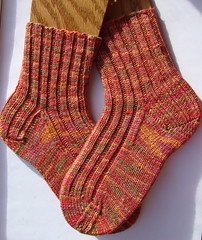
From one skein of Yarn Yard Pencil Roving.

To this knitted bag............this bag has a stocking stitch base, the first bag had a garter stitch base.

Close up...........

Felted and blocking........

Felted close up.................

Free Pattern
Side-Along-Bag: by Gilraen
Materials: Pencil Roving 100gms, 9mm circular needles or DPNs, 4 stitch markers, darning needle to finish bag.
Optional: button
Using one skein of Pencil Roving cast on 13 stitches and knit 6 rows in Garter stitch or 5 rows in stocking stitch, for which ever effect you prefer. Garter will give you a firmer base but stocking stitch leaves a rounder bottom and allows for more yarn for the handle.
Then using circular needles or DPNs pick 3 stitches on each side and another 13 stitches on the opposite side, placing a stitch marker at each corner, so you have a total of 32 stitches.
Knit 3 rounds then
KFB, K11, KFB, K3, KFB, K11, KFB, K3, (36 stitches)
Knit another 3 rounds then
KFB, K13, KFB, K3, KFB, K13, KFB, K3 (40 stitches)
Knit another 5 rounds then
K2tog, K13, K2tog, K3, K2tog, K13, K2tog, K3 (36 stitches)
Knit another 5 rounds then
K2tog, K11, K2tog, K3, K2tog, K11, K2tog, K3 (32 stitches)
Knit another 3 rounds and then
K2tog, K9, K2tog, K3, K2tog, K9, K3 (28 stitches)
Knit 2 more rounds then
K1 casting this stitch off, K9 and turn work (leaving the remaining stitches on a cable/needle etc)
Now knit in stocking stitch for 9 rows ending on a knit row, on the next purl row decrease one at the end by P2tog.Continue this decreasing 5 times until you are left with 4 stitches, SSK on next knit row and P2tog on the following Purl row, SSK on last row and cast/bind off.
Returning to the remaining stitches hold the bag with the flap to your left and knit across the remaining stitches, casting off until you have 3 left on the needle. You can I-cord this or knit back and forth which ever is your preference. I knit back and forth to leave an asymmetrical cast off at the end as a feature, but it’s up to you.
Then felt the bag as your machine allows or by hand if no machine. Block: I used plastic bags stuffed tightly to ‘shape’ the bag, and stretched the handles. Allow at least 24 hours to dry and then decorate as you see fit.
If anyone finds a mistake in the pattern please please let me know, I'm only human. :D
EDIT: I forgot to tell everyone that the creative genius who came up with such a great name was Linz. Thank you!! :)


12 comments:
Wow! That's a lovely bag and the pattern seems really easy to follow. Well done, you!
Thank you for writing the pattern up for us. It is a great bag!
Oh, that's cute! I love the little star button, too.
I love this bag! Thank you so much for sharing the pattern.
That is one lovely little bag Gilraen, you clever thing. I love the name ;)
Very lovely! Thanks for the pattern!
It's a great little bag, and you have found the perfect button for it :-)
Such a cute little bag - thank you for sharing the pattern :)
Thank you for writing up and sharing this patter, Gilraen! It'll be on my Christmas presents to-do list for the little one's!
Great bag! I love the shape of the flap and the star button.
Lovely bag, thanks for writing up the pattern!
Wow, that's perfect timing! I've been taking quite an extended "down-time" from knitting in order to pursue educational and work-related goals, and what's the first UFO I pick up once I decide to start knitting again? My Side-Along Bag, knit in green-blue-purple pencil roving! And just in time to see your new write-up of the pattern for it! Thanks a million!
Post a Comment